Well, the Husband turned the big 3-0 recently and to celebrate, we hosted a "T"-themed party (for Husband "Tim") - guests were requested to dress as something starting with the letter "T". The prizes for best-dressed also started with the letter "t"- Toblerone, Twix, Tim Tams, tissue paper, toilet paper, towels. I had planned on making the birthday cake - a few months ago a colleague and I had seen in a women's magazine a recipe for a burger cake and we thought it was cute. She ended making a steak cake for her partner's birthday, and when the time came for the "T" party, she suggested I make a "T-bone steak cake" which I thought was brilliant on so many levels!
The Husband loves nothing more than a rare piece of steak, and the cake would adhere to the "T"-theme. My work colleague got her inspiration from other blogs, and emailed me a link to I'm Hungry Too 's steak cake. My decision to make the cake red-velvet with cream cheese frosting 'mashed potato' was solely from this blog, so thanks to her brilliance! Many thanks to other random pictures and blogs on the internet (Hurray for the internet!) that featured various T-Bone steak cakes.
So I started by making a round red-velvet cake using the recipe from the Hummingbird Bakery. Then after it cooled a little on the rack, I started to cut the cake into shape. If you asked me, it looks like South America, with the southernmost point cut off.
 South America Red Velvet cake - who ate Patagonia??
I then used store-bought icing and added brown and black to it. This took the LONGEST time. I never knew just HOW MUCH colouring is needed to get the desired brown! Each time I got the desired shade of brown for the 'bone', then the 'fat', I'd peel off a portion and set aside. Then added MORE brown and black and kept on kneading. When I FINALLY got the colour of the 'meat' that I wanted, I wrapped the cake with the rolled icing, and started to make the indentation for the t-bone...

Bone: I spent a lot of time trying to get the bone to look real - made sure the top part of the 'bone' had the hollow bit where the marrow goes, then finally, dotted brown-black gel colouring on the bone and smudged it in.
Fat: I wasn't TOO pleased with how this looked, but it did the job. I rolled some icing flat, then used a chopstick to 'straighten' the strap of 'fat' then wrapped it around.
Grill marks: This wasn't too difficult - I used a chopstick to make indentations into the 'steak' and then simply coloured it in by using a big metal pin covered with black gel colouring (I've just discovered it's called a flower nail, which came with my Wilton's cake decorating set).

The three accompanying veggies were no-brainers - peas and carrots are probably the easiest veggies made with coloured icing; and the mashed potato as mentioned before was the cream cheese frosting (some brown gel colouring added, although I don't know if it made much difference) that usually went atop red-velvet cakes. A friend who is Buttercup Bakeshoppe helped out by stamping 'Happy Birthday' with edible ink on a 'slab of butter' .
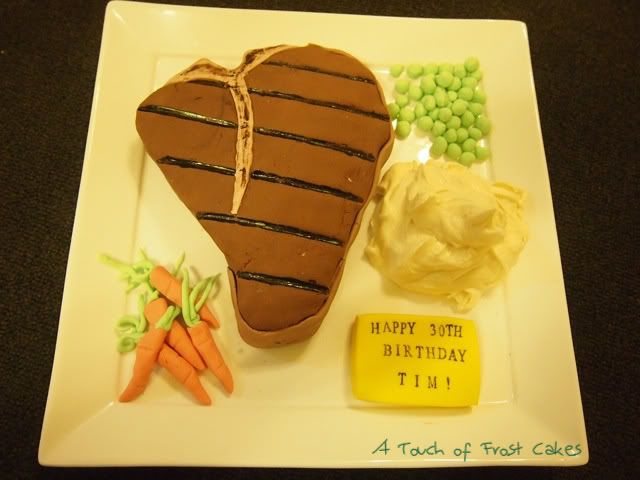
Ta Dahhh!!!!!
When I finally finished at 3:30am I couldn't help but wake the birthday boy to admire the finished product! It was to be another 18 hours before the steak was finally cut and the rare-ness revealed.
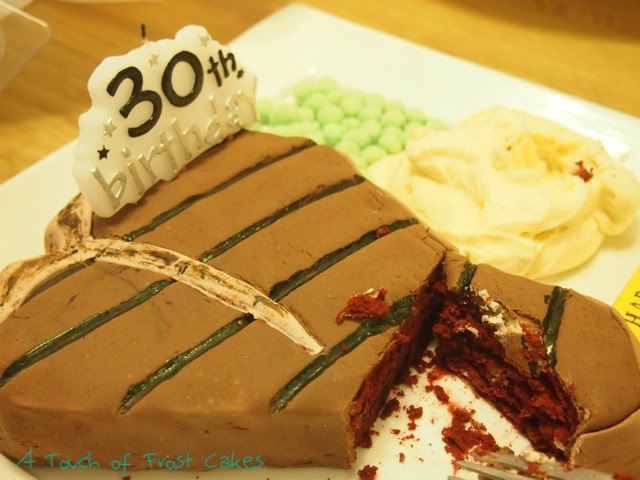
Steak best-served rare
Teenage Mutant Ninja Turtle (aka the Husband) was thrilled! Happy Birthday, darling!
That is an awesome effort!! Well done! And thanks for linking my blog :)
ReplyDeleteHappy 30th to your husband (the lucky man hehe)
Thanks Brenda! I see that you too celebrated your 30th recently - happy birthday! Hopefully when I turn 30 MY husband will bake me a massive amazing cake (HIGHLY unlikely)
ReplyDeleteSuch a clever cake! Love that you used red velvet for the steak. Love seeing all the creativity floating around amongst my friends!
ReplyDeleteGreetings,
Kat.